
Are you trying to edit your sunset photo but not getting the expected result? Do you want real estate images at sunset to become sharper, true to every detail and more vivid colors? Editing sunset images can seem like a difficult one for beginners to get used to with photo editing software. However, with the simple 6-step editing guide here, you’ll be able to make any photo look professional and impressive.!

Day to Dusk photo editing service at BAYREPO
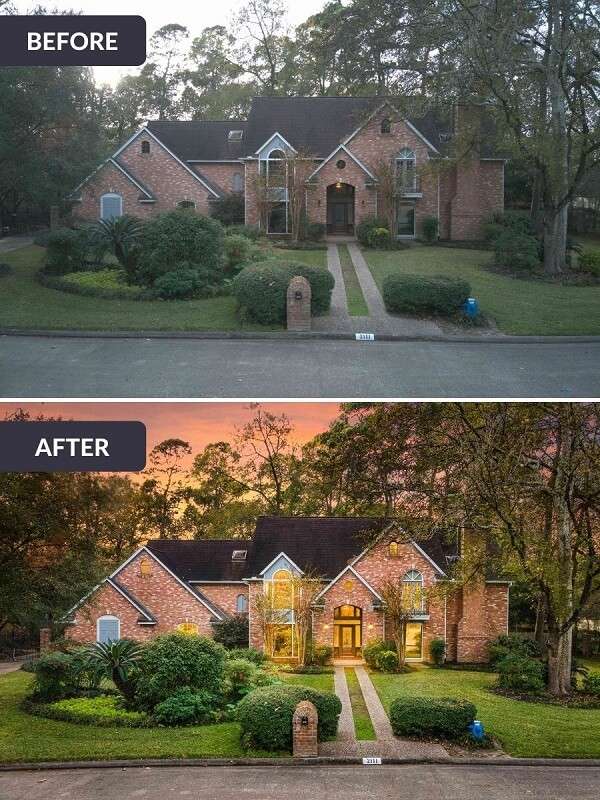
Surely everyone thinks that to get a beautiful sunset photo, a photographer will need to have the perfect golden hour frame to capture that beautiful moment. This is true, but not entirely accurate. Because with the development of technology and photo editing tools, we can now turn day to dusk photos easily.
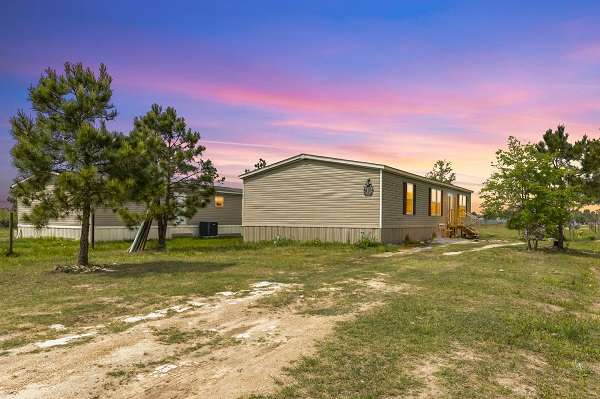
BAY REPO is the leading professional real estate photo editing service unit in Vietnam and has provided services to more than hundreds of customers globally. Here, we specialize in providing day to dusk photo editing services for the real estate sector. Real estate images at dusk and sunset with warm, soft light will surely attract many potential buyers for your real estate project.
To best serve the post-production process, you also need to know a few helpful tips to get quality photos. Refer below!
A few simple tips to have an impressive sunset real estate photo
Post-processing helps to improve image quality, providing a more professional and impressive image than ever before. But first, you need to capture beautiful and clear real estate photos. Here are a few simple tips you can try for great photos:
- Use a tripod: Using a tripod helps stabilize the camera, preventing image shake and blur – especially when shooting long exposures.
- Use GND filter: this is one of the devices that supports color neutralization and exposure balance more effectively
- RAW shooting: shooting RAW instead of JPEG helps you capture most of the details. It also makes it easier to edit photos later on
- Manual mode shooting: at dusk, the light continuously changes every second every minute. Therefore, the automatic shooting mode will no longer be useful. Manual shooting mode gives you easier and more flexible control over focus and exposure.
The next step after taking photos will be an important post-production stage. Lightroom software is used by many people to edit images, especially photographers. So what is outstanding about this photo editing software?
Introduction to Lightroom
Lightroom or fully Adobe Photoshop Lightroom (developed by Adobe Inc), is the leading professional image management and editing software today. The software is now officially available on both Windows and macOS operating systems. This is an application suitable for all types of users from those who love to edit photos and professional photographers to professionals,…

Compared to Photoshop, Lightroom is more appreciated for its user-friendly interface, and ease to manipulate and edit. In addition to being a professional photo editor, Lightroom also features easy image sorting, management, and search features. This makes Lightroom the favorite tool of most photographers – users who need to deal with large amounts of images on a regular basis.
Detailed steps to edit sunset photos in Lightroom
Real estate photos at the time of twilight always have a very unique and attractive beauty. Each picture will have different characteristics in terms of composition, color, and brightness, … However, the 6 basic photo editing steps in Lightroom below can be applied to most photos, helping to improve image quality effectively:
Step 1: Upload the image you want to edit to the software
First, you’ll need to load the real estate image you want to edit into Lightroom. Do this by clicking the Import button at the bottom left corner of the screen in the Library module. Next, select the folder containing the images you want to upload and click the Import button. This will help add the images to be edited to the Lightroom Catalog to start editing.
Step 2: Change the color profile
Lightroom offers a wide range of color profiles that you can use to enhance your sunset photos. To change the color profile, do the following:
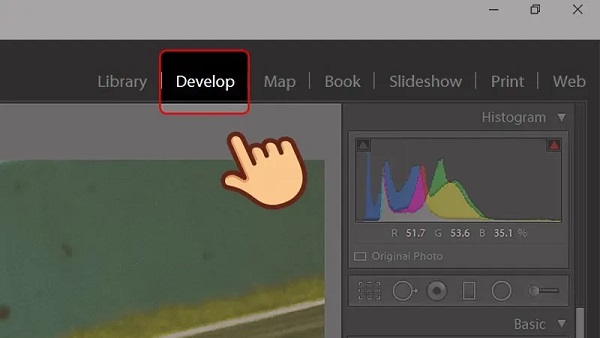
- Click on Develop module > Select Basic Panel.
- At the top of the panel, go to Profile. Here there will be a drop-down menu allowing the user to select the desired color profile.
There are four color profiles: Artistic, Black and White, Modern, and Vintage. In particular, the Modern color profile will be an interesting choice for sunset photos.
Step 3: Adjust the exposure
Adjusting the exposure of the image is quite important. If the image is underexposed, every detail will become blurred and lifeless. Conversely, an exposure that is too high will cause the image to be overexposed.
One of the effective ways to fix exposure errors in Lightroom is to go to Develop module > Select Basic Panel > Click the Auto button. This step will automatically adjust the exposure of the image. However, not all cases will bring the expected effect.
Besides, you can also adjust the exposure manually: go to the Exposure slider (below Tone). Move the slider to the right to increase exposure and vice versa to the left to decrease exposure.

Step 4: Use white balance
The white balance feature allows to balance of the colors of the light source from the surrounding environment so that the image does not suffer from tonal aberration. In Lightroom, to edit white balance we do the following: in the Develop module > select Basic Panel > Select White Balance (WB).
- If it’s a RAW image, click the drop-down arrow to see all available white balance modes. Choose the setting that best suits the shooting conditions and then views the results.
- If it is a JPEG image, you have to adjust it manually.
- First, select the Eyedropper icon (the pen next to the WB).
- Enlarge the photo, use eyedropper to select the most neutral color area.
- Click on the neutral area to see the change, do it again and again until satisfied with the result.
Step 5: Increase the shadow to create depth
After adjusting the exposure and white balance, the next step is to increase the shadows to create depth in the image. To do this, we use the Shadows adjustment feature.
- Go to Develop module > Basic tab
- Adjust the shadow by moving the Shadow slider to darken or lighten the details of the dark areas of the image.
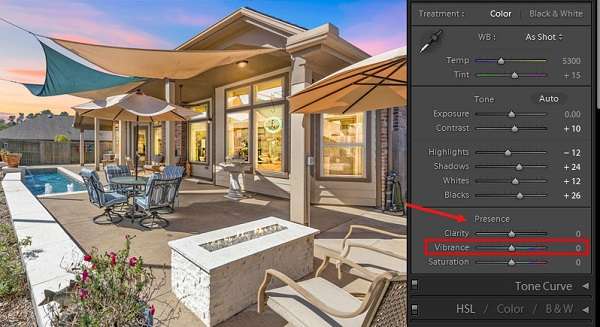
Step 6: Customize the brilliance of the colors
A sunset photo is indispensable for the brilliance of the afternoon sun’s rays. To bring out the colors for a sunset photo, the Vibrance adjustment feature will be useful. Drag the slider right or left to increase/decrease the color intensity (red, orange, yellow,…) of the image.
Conclusion
By now you probably know how to edit sunset photos in Adobe Lightroom. Based on the above 6 basic steps to experiment with different types of sunset shots. If you are interested in the day to dusk photo editing service at BAY REPO, please contact us immediately for specific advice!
Adddress: Green Bay Building – Thang Long Avenue, Me Tri Ward, Nam Tu Liem District, Hanoi
Email: [email protected]
Pingback: 10 Best Real Estate Photo Editing Software in 2022